Drawing of a Rose Easy Drawing of a Rose
This step by step tutorial explains how to draw and shade a rose and providers detailed pencil drawing examples for each step. It can be very helpful for anyone looking to learn how to draw a realistic looking rose.
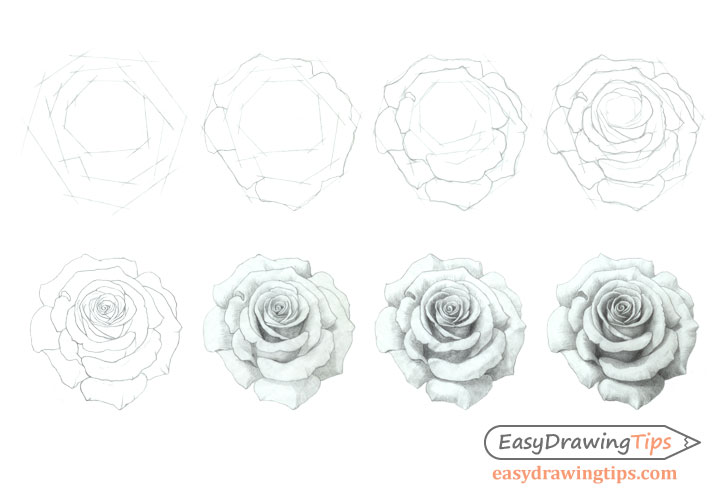
The tutorial can be split into three major parts which are the shape sketch, the outline drawing and the shading. As roses are fairly difficult to draw, if you find yourself struggling with the first two parts you may want to simply practice drawing those before moving on to the shading.
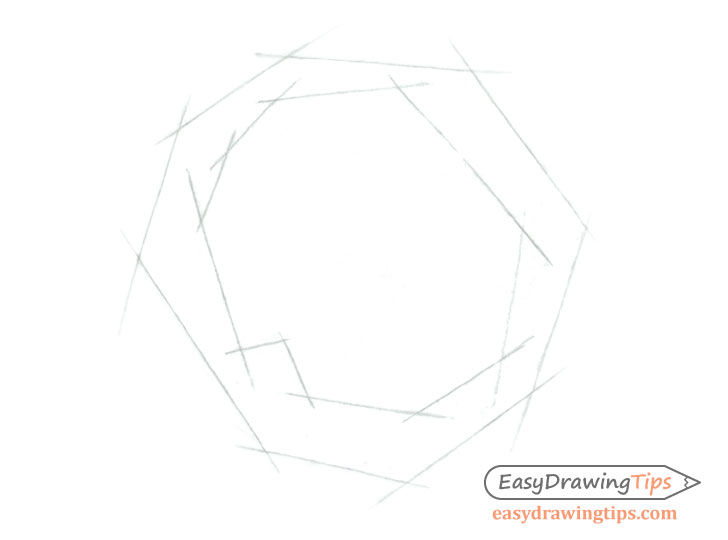
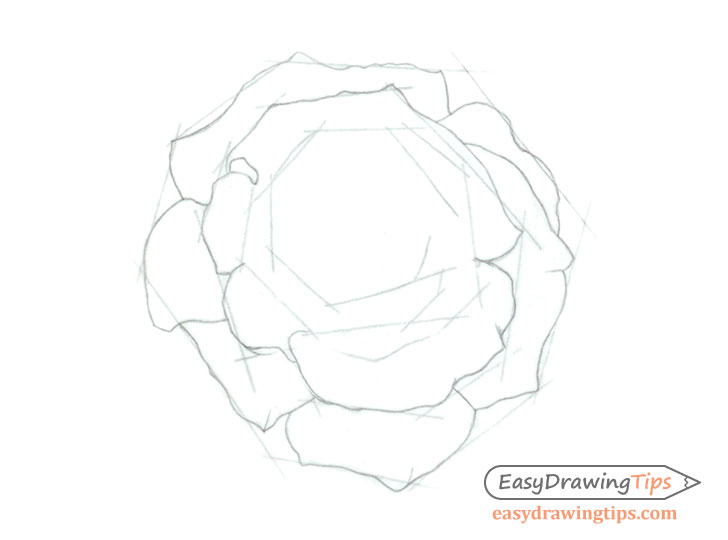
Step 1 – Sketch the Overall Shape & Size of the Rose

Start drawing the rose by first sketching its overall shape sizing it to your drawing area. The outer shape sketch does not need to be the exact outline trace of the rose (that will be done in later steps) instead you want to establish a sort of construction frame that the rose will fit into and that you will then use to draw the more detailed shape.
This step is very important so do your best to get it right. Make sure the shape is not overly long, tall, or too skewed in any direction in comparison to the rose you are drawing. If you make a mistake at this stage the rest of your drawing will be off.
For more good drawing practices see:
Beginner Guide to Learning to Draw
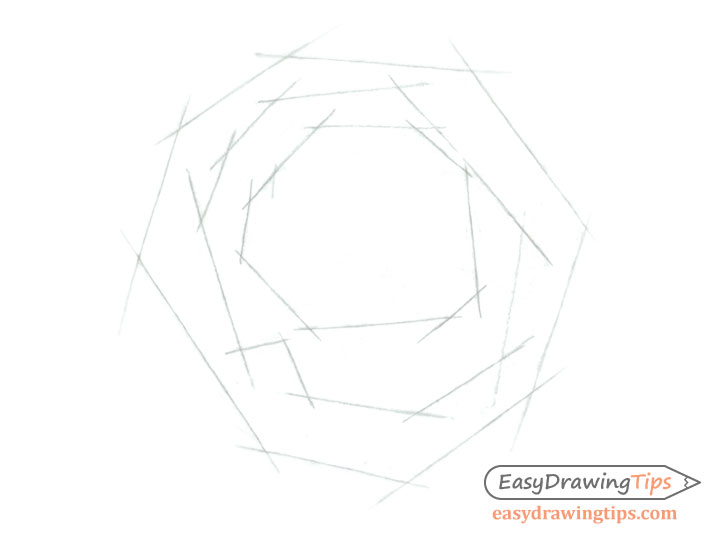
Step 2 – Sketch the Inner Shape of the Rose
This stage of the drawing can be a little bit tricky as it may be hard to pick the exact petals that you want this inner shape to consist of. Try and pick the best defined shape you can. The goal is to establish some structure of the inner part of the rose so that when you draw the individual petals later it will be easier to correctly proportion them in relation to one another.
Without this step if you move on to drawing the petals individually you may find some of them to bee too big or too small.
Step 3 – Sketch the Shape of the Core of the Rose
This step is similar to the previous step. You want to establish the position of the core/center of the rose.
After you finish this step you should have a rough guide/construction lines for the outer, middle and inner shape making it easier to correctly place all of the petals.
Step 4 – Draw the Outer Petals
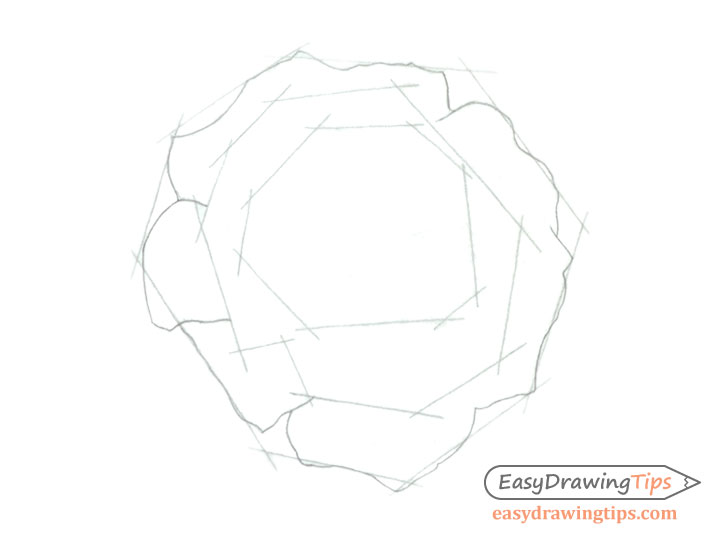
Draw the first set of petals between the outer and inner guide lines draw in step one and step two.
Step 5 – Draw the Inner Petals
Draw the second tier of petals between the inner part and the core of the rose.
Step 6 – Draw the Core Petals
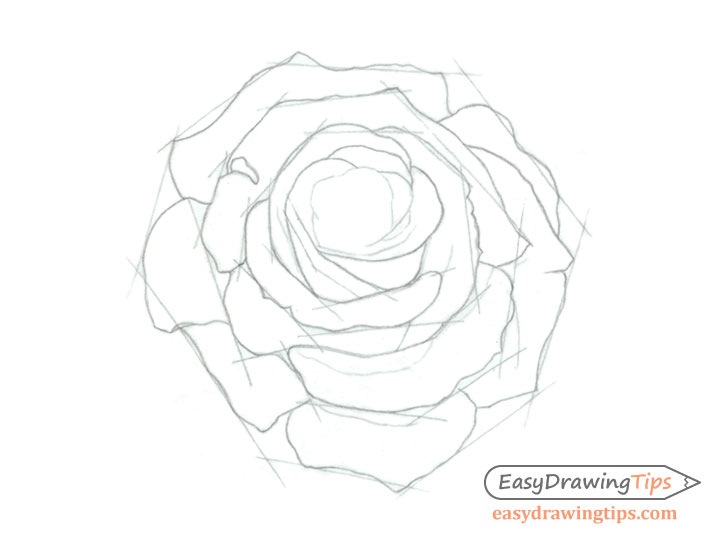
Draw the core shape of the rose and move to drawing the petals inside of it.
Step 7 – Outline Drawing of the Rose
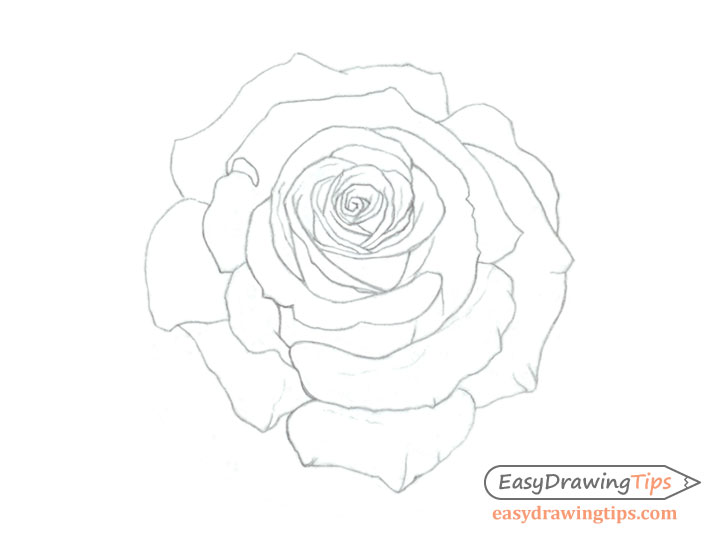
Draw the very inner petals of the rose and clean up all of the guide lines. Tweak any of the smaller details if needed. When you are done you should have an outline drawing of the entire rose.
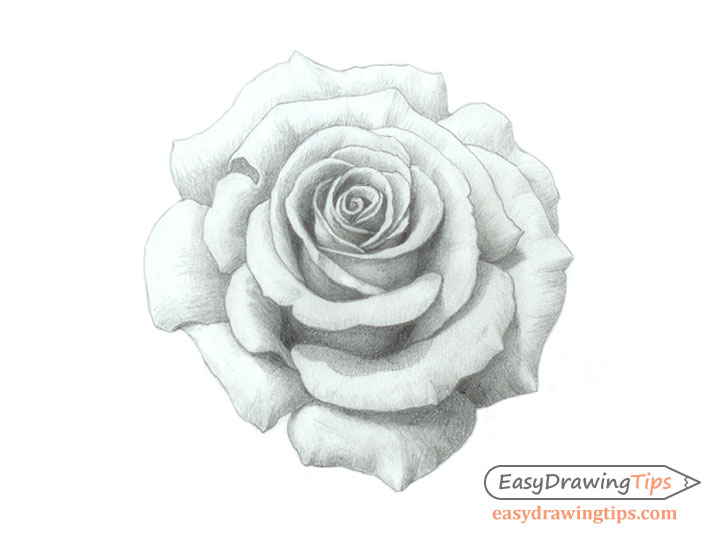
Step 8 – Basic Shading
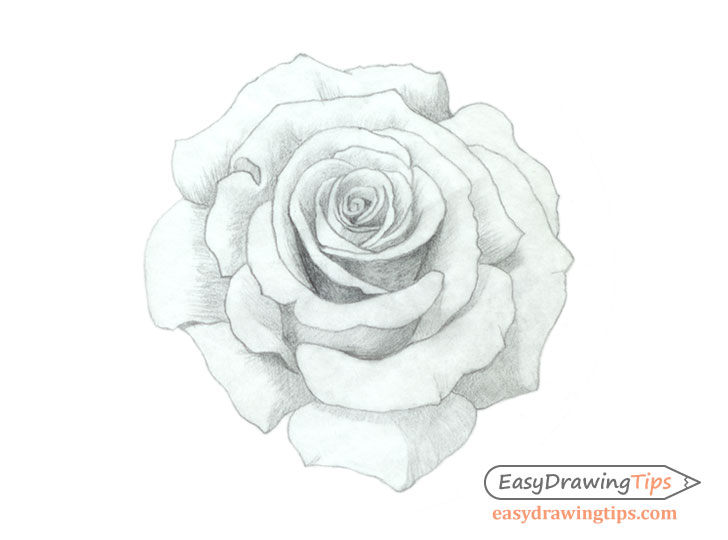
Start applying light shading to the outline drawing of the rose by first shading the darkest areas. Most of these will be the parts between the petals as well as the shadows cast by the petals on one another.
You want to apply the shading slowly in several layers so that you don't accidentally make it too dark and so that you can be sure that the different parts of the rose have the right intensity of shading in relation to one another. You should also try and apply the strokes in a way that reinforces the shape of the petals. For example for the more outer petals you can make the strokes in the direction away from the core of the rose.
Also note that the shadows will depend on the light source and will be directly opposite of it. In this case the main light source is located around the top part of the drawing so the shadows will be cast downwards. Also keep in mind that the shadows will be similar to the shape of the petals that are casting them.
For examples of different types of shading strokes see:
Shading Techniques and Stroke Types Drawing Tutorial
Step 9 – Additional Shading
Continue applying shading to your drawing by adding additional overlapping sets of strokes and darkening the shaded areas of the rose.
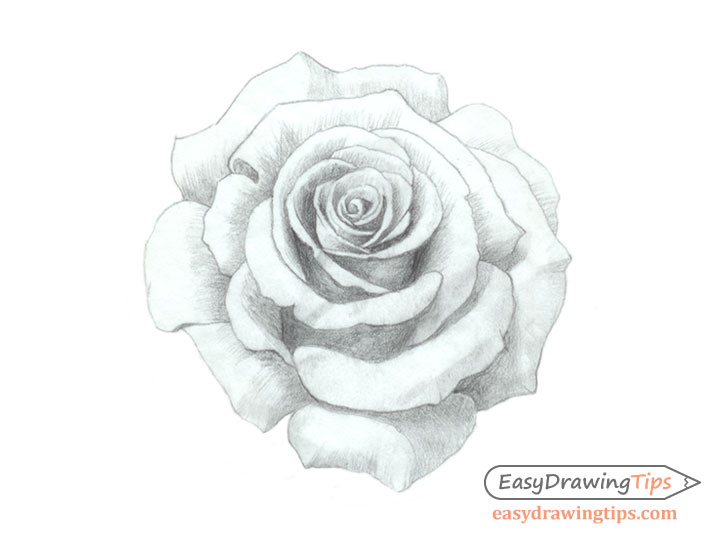
Step 10 – Finalized Drawing
Finalize the drawing by adding in all remaining drop shadows and darkening the shaded areas even more. You will also want to smooth out some of the transitions between the light and dark areas by slightly blending the strokes. But don't blend them to the point of invisible as they also help to define the rose's shape.
Conclusion
Drawing a rose can be very complicated due to its irregular shape but it can be very helpful to approach the drawing process in the right way. Always try and start your drawing with a rough overall shape sketch of the object and work your way down to the details. If your drawings don't come out at first keep practicing and you should improve.
If you want to practice drawing something a little easier you may like:
How to Draw a Maple Leaf in 3 Steps
For other tutorials that involve pencil shading see:
- How to Draw Cloth Folds Step by Step Tutorial
- How to Draw Cherries Step by Step
- How to Draw Nuts Step by Step
Source: https://www.easydrawingtips.com/how-to-draw-a-rose-step-by-step/
0 Response to "Drawing of a Rose Easy Drawing of a Rose"
Postar um comentário